As a slip-caster, before I can get to making things with clay
I need to make my molds...
First over to the supply shopping places.
Being in Boeing Town, a lot of the fun industrial supply places
are used to a slightly different clientele than artists.
This book was in the waiting room lobby,
and I got huh-hum, I mean "had" to wear safety goggles while testing the samples.
In the end the best stuff I found for my purposes was from MJ Fabrics,
they "specialize in fetish fabrics" and as a bonus, I'm now on their mailing list...
better than what the Gap emails every week for sure!

Then, into the plaster room with its super bright green wall,
that feels like riff of a room on The Real World, MTV
(for those of you who are old enough)
Properly kitted out, we even have weighing scales, and timers!
I've never weighed my plaster out before,
& just used the island method.
Turns out, it is very accurate...
but I've gone back to the island anyway
(too much faf)
Anyway, so large and ambitions:.
A huge stretched-laytex, suspended form shenanigan....
and then realized, I need slip to cast it with.
So I left the mammoth aside to dry
and made some smaller molds to test the clay with.
Testing clay with such a big form would make for some expensive lessons.
These smaller forms will give lots of starting info
& then I'll take it on from there.
(also, I wanted to make these shapes too)

latex set-up before the plaster was cast.
(next image is a different latex)
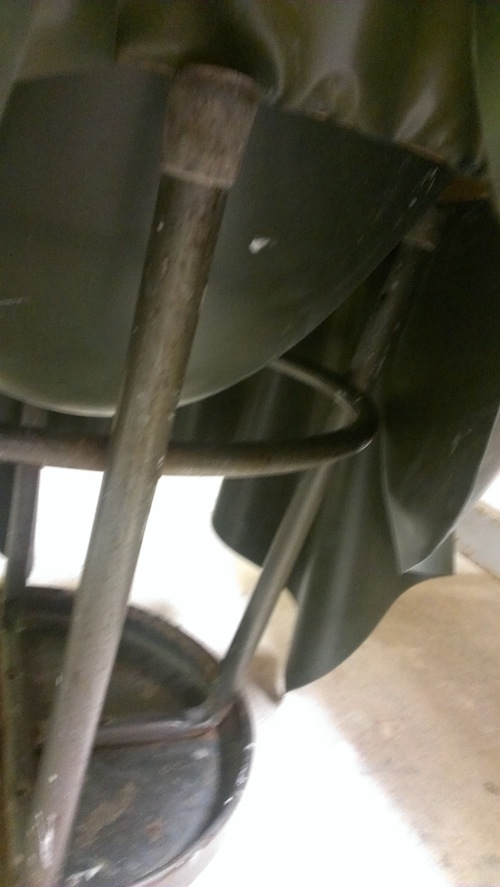
view of plaster bulge, stretching the latex,
(resting on the upside down legs of a chair)

mammoth plaster positive...